Serverless caching and proxying with Cloudflare Workers
Cloudflare Workers provide a powerful way to run serverless JavaScript code on Cloudflare's edge network, placing your logic closer to your users without requiring dedicated servers or additional infrastructure. This flexibility makes Cloudflare Workers a compelling choice for numerous use cases, such as avoiding rate limits on remote APIs, implementing CORS proxies to get around cross-origin restrictions, or to improve performance by relying on Cloudflare's cache.
In this article, we’ll explore how to use Cloudflare Workers to build a serverless caching proxy for a JSON API. By implementing this pattern, you can cache API responses for improved performance, handle cross-origin requests, and even simplify interactions with third-party APIs.
By the end of this guide, you’ll have a fully functional worker capable of:
- Proxying API requests and caching responses.
- Resolving CORS issues to support frontend applications.
- Enhancing API performance without the need for additional servers.
Let’s get started!
Why use a proxy for JSON APIs?
Here are some common scenarios where a proxy may be required when working with APIs:
- Improved Performance with Caching: APIs, particularly those relying on third-party services or dynamic data sources (e.g, Google Sheets-based APIs), can be slow to respond or prone to rate limiting. By caching responses at the edge with Cloudflare Workers, you can deliver faster responses to your users and reduce the load on the upstream API.
- Rate Limiting and Cost Management: Many APIs enforce strict rate limits, charging extra for exceeding these thresholds. A caching proxy minimizes the frequency of requests hitting the API, keeping usage within acceptable limits and reducing costs.
- Resolving Cross-Origin Restrictions (CORS): Modern web applications often need to fetch data from APIs hosted on different domains, which can lead to cross-origin resource sharing (CORS) issues. A Cloudflare Worker can act as a CORS proxy, allowing your frontend to access APIs seamlessly without running into browser restrictions.
- Simplifying URL Management: APIs sometimes have complex or cumbersome URL structures that can be challenging to work with in frontend code. A proxy can clean up or standardize these URLs, making them easier to consume.
- Serverless Scalability: Unlike traditional server-side proxies, Cloudflare Workers automatically scale with traffic, eliminating the need to manage servers or worry about scaling infrastructure as your API usage grows.
Imagine you’re working with a JSON API built on Google Sheets. This API might be slow to respond and has strict rate limits. By using a Cloudflare Worker as a caching proxy, you can reduce response times for your users by caching responses for a set period, while staying within resource rate limits. A worker can also add CORS support to ensure there are no issues with frontend apps accessing these APIs.
With these benefits in mind, let’s dive into the technical setup and implementation of a proxy implemented in Cloudflare Workers.
Setting up a Cloudflare Worker
First, we need to install the Cloudflare CLI. This is a tool that allows you to manage your Cloudflare account from the command line. You can install it using npm:
npm install wrangler --save-dev
Next, we need to log in to our Cloudflare account. You can do this by running:
wrangler login
This will open a browser window, where you can log in to your Cloudflare account. Once you have logged in, you can create a new worker by running:
wrangler generate my-worker
This will create a new directory called my-worker, and in the console, give a guided walkthrough to set up a basic config (git initialisation, test stubs). The wizard will ask whether you want to use Typescript - I'm going to use regular Javascript for this example below, but feel free to use Typescript if it's more up your street!
The wizard will ask about the type of app you want - select Fetch handler for now. The choice doesn't matter much as we'll replace all content shortly.
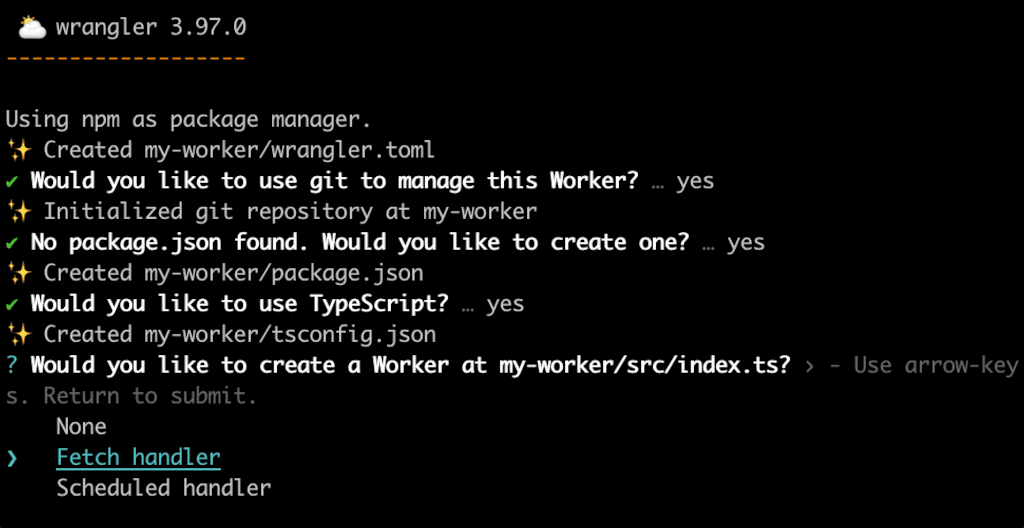
Next start our basic script:
cd my-worker && npm start
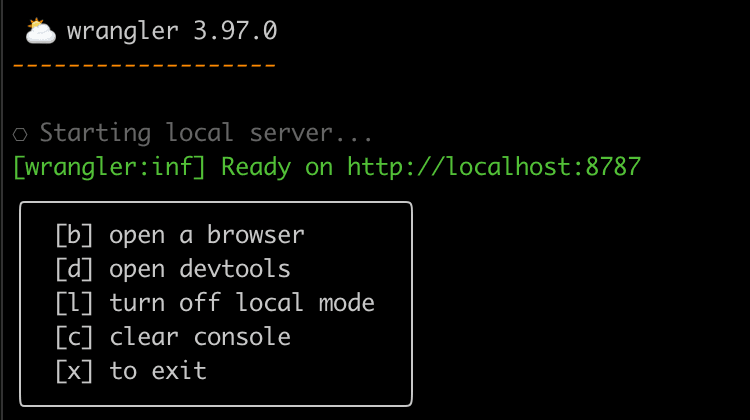
Opening the browser will show a "Hello world" example. Checking the content of our index.js, we have something like this:
export default {
  async fetch(request, env, ctx) {
    return new Response("Hello World!");
  },
};
Building the proxy
We'll start by doing a simple pass-through proxy for our JSON api. For this simple example, we're going to assume that we're making GET calls, and that the url path our proxy receives will be the same path used on the origin, e.g. proxy.com/posts/1 -> origin.com/posts/1.
Within our index.js file, add a new fetchRemoteUrl(url) function:
async function fetchRemoteUrl(url) {
  let targetUrl = 'https://www.example.com'+url.pathname;

  // Fetch the target URL and proxy the response
  return await fetch(targetUrl);
};
In this example, we're mapping a pathname from our proxy directly to an origin server, but if we're doing something like proxying a Google Sheets JSON API with a messy URL structure, we could have a kind of mapping in our proxy, e.g.
async function fetchRemoteUrl(url) {
  let targetUrl = '';
  if (url.pathname == '/proxy/posts') {
    targetUrl = 'https://script.googleusercontent.com/a/macros/[....]'
  } else ...
Inside our default funciton, pass our url to this helper function:
export default {
  async fetch(request, env, ctx) {

    let {json, status, headers} = await fetchRemoteUrl(new URL(request.url));

    let response = new Response(JSON.stringify(json), {
      status: status,
      headers: {
        ...headers,
        // Force json content type
        "Content-Type": "application/json",
        "Cache-Control": "public, max-age=120, s-maxage=120"
      },
    });

    return response;
  },
};
What we're doing here is calling our proxy to pull in the json content, then returning the response. We're adding a couple of headers:
Content-Type: The source API is ideally returning a content type ofapplication/json, but some APIs will return json ascontent/text. This generally doesn't cause a big issue, but we've one eye on using Cloudflare's caching, for which proper content types help.Cache-Control: We're going to set headers which will tell Cloudflare's cache that it's ok to cache the response for 2 minutes. This should only be used on data which it's safe to cache globally (not per-user).
Visiting our worker in the browser will show the content being proxied - so far, so good!

Adding CORS support
When working with APIs consumed by frontend applications, one of the most common challenges we face is resolving CORS (Cross-Origin Resource Sharing) issues. If your frontend application is hosted on a different domain than the API you’re consuming, browsers may block the requests due to security restrictions.
What is a CORS error?
A CORS error occurs when the browser detects that a request is being made across origins without the appropriate permissions. Common CORS-related error messages include:- Access to fetch at 'https://api.example.com' from origin 'https://www.yourdomain.com' has been blocked by CORS policy.
- Response to preflight request doesn't pass access control check: No 'Access-Control-Allow-Origin' header is present on the requested resource.
- Request header field 'Content-Type' is not allowed by Access-Control-Allow-Headers in preflight response.
Adding CORS support to a Cloudflare Worker
We start by defining a set of CORS headers that will allow our API to respond to cross-origin requests.const corsHeaders = {
"Access-Control-Allow-Origin": "*", // Allow requests from any origin
"Access-Control-Allow-Methods": "GET, OPTIONS", // Allowed HTTP methods
"Access-Control-Allow-Headers": "Content-Type", // Allowed headers in requests
};
- Access-Control-Allow-Origin: Determines which origins are permitted to access the resource. Setting it to
*allows access from all origins - if you want to limit access to certain domains, list them here. - Access-Control-Allow-Methods: Specifies the HTTP methods allowed (e.g,
GET,POST,OPTIONS). - Access-Control-Allow-Headers: Lists custom headers our API will accept.
Handle Preflight (OPTIONS) Requests
When a browser makes a cross-origin request, it often sends a preflight request with the HTTPOPTIONS method to check if the server allows the request. To handle this in the worker:
if (request.method === "OPTIONS") {
  return new Response(null, {
    status: 204, // No content
    headers: corsHeaders, // Respond with CORS headers
  });
}
If we place the corsHeaders definition and OPTIONS check at the top of our fetch() function (i.e. before the remote Proxy call), this ensures that the browser can confirm the request is allowed without any additional overhead or remote fetches.
Add CORS Headers to All Responses
To ensure all responses include the necessary CORS headers, we make one small change to the response creation:let response = new Response(JSON.stringify(json), {
status: status,
headers: {
...headers,
...corsHeaders, // Add CORS headers
// Force json content type
"Content-Type": "application/json",
"Cache-Control": "public, max-age=120, s-maxage=120"
},
});
We've now got a worker which can proxy requests to another service, and can also act a CORS proxy. A good start! Let's deploy this to Cloudflare and confirm it's working ok.
Deploying and Managing Workers
From the command line, run:
wranger deploy
If you have more than one Cloudflare account available, wrangler will walk you through selecting the right account. Once the account has been picked, the worker will be deployed, and you'll get a test url, like https://my-worker.{{ USER }}-{{ ID }}.workers.dev.
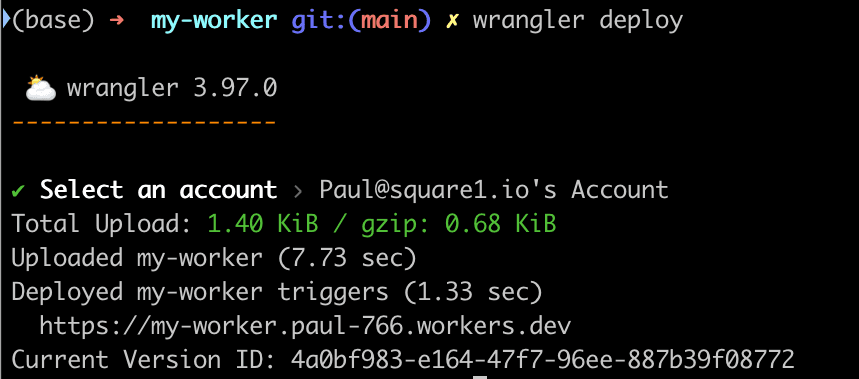
Within your Cloudflare account, you'll see the "Workers & Pages" sidebar menu - clicking this shows a list of workers available on your account. Clicking into any one worker will let you see stats on usage, as well as an "Edit Code" button. This opens up an inline editor where you can make quick changes to the js in the project - ok if you need to make a quick, emergency change, but if we started in a local IDE with version control, future us will thank us to stay with the local development!

Caching
One of our main goals here is to leverage Cloudflare's cache, either to speed up our local responses, or possibly help with rate limiting concerns. We're going to build a cache key based on our url, check if it's in the cache already. If it is, return it. If not, fetch it, add to the cache, then return it.
const cacheUrl = new URL(request.url);

// Construct the cache key from the cache URL
const cacheKey = new Request(cacheUrl.toString(), request);
const cache = caches.default;

// Check whether the value is already available in the cache
// if not, you will need to fetch it from origin, and store it in the cache
let response = await cache.match(cacheKey);

if (!response) {
  console.log(
    `Response for request url: ${request.url} not present in cache. Fetching and caching request.`,
  );

  let remoteResponse = await fetchRemoteUrl(cacheUrl, corsHeaders);

  response = new Response(remoteResponse.body, {
    status: remoteResponse.status,
    headers: {
      ...remoteResponse.headers,
      ...corsHeaders,
      "Content-Type": "application/json",
      "Cache-Control": "public, max-age=120, s-maxage=120",
      // Add timestamp to the response headers
      "X-Responsed-Time": new Date().toISOString(),
    },
  });

  // Into the cache we go!
  ctx.waitUntil(cache.put(cacheKey, response.clone()));
}

return response;
The line ctx.waitUntil() ensures that the cache operation will complete, and not block the overall flow.
As part of the caching, we're adding a X-Responded-Time header. This is something we can keep an eye on to determine that the cache is working effectively. Checking the headers on this response should show this timestamp when the request hits a cold cache, then on subsequent requests for 2 minutes (the 120 seconds of the Cache-Control header), we should get that same timestamp each time.
Run wrangler deploy once more, and we're live!
Custom URLs
We are live with a url like https://my-worker.{{ USER }}-{{ ID }}.workers.dev, but maybe we want the worker to run under one of our domains.
Within Cloudflare, workers live at the account level, and are priced there (rather than per-domain, where most Cloudflare pricing is done). If we want to associate a worker to a specific domain and URL, the next steps are:
- Log into the Cloudflare web interface, and select the domain you want.
- From the menu on the left, select "Workers Routes".
- Click "Add Route" on the screen which appears.
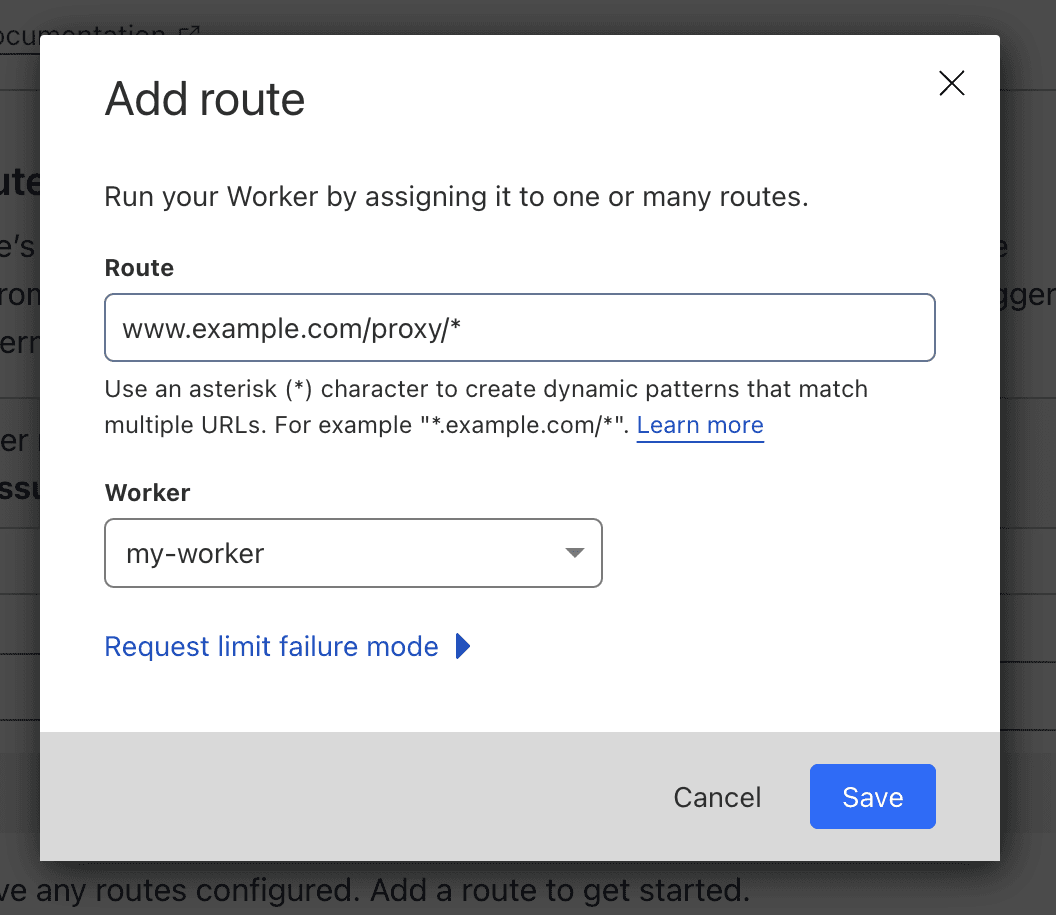
When defining a route, the worker can be assigned to a specific URL (www.example.com/proxy/), or a wildcard can be used to allow multiple routes to pass to the worker (www.example.com/proxy/*). Saving this route will mean that it is active on Cloudflare within a minute or two.
N.B. If we're proxying based on the pathname, in our local tests our worker has been running at the root position. If a URL is set up with any other URL prefix (/proxy/ in the example above), then this token will be in the url path our worker accesses. So if we're relying on the path as part of our proxying to another API, be sure to take this into account when setting the URL!
The "Request limit failure mode" option here is worth looking at for a moment. Cloudflare has a variety of Workers Plans available, each with its own quota and behaviour for overages. On the standard paid plan, there's base fee for 10m requests, with additional ones charged at $0.30 per million. There is also a free plan, with a lower cap (100k per day). In the case of the free plan, what happens when we go over the 100k per day invocations? That's what we get to choose in the "Request limit failure mode" dialog. Clicking it will expand a couple of options.
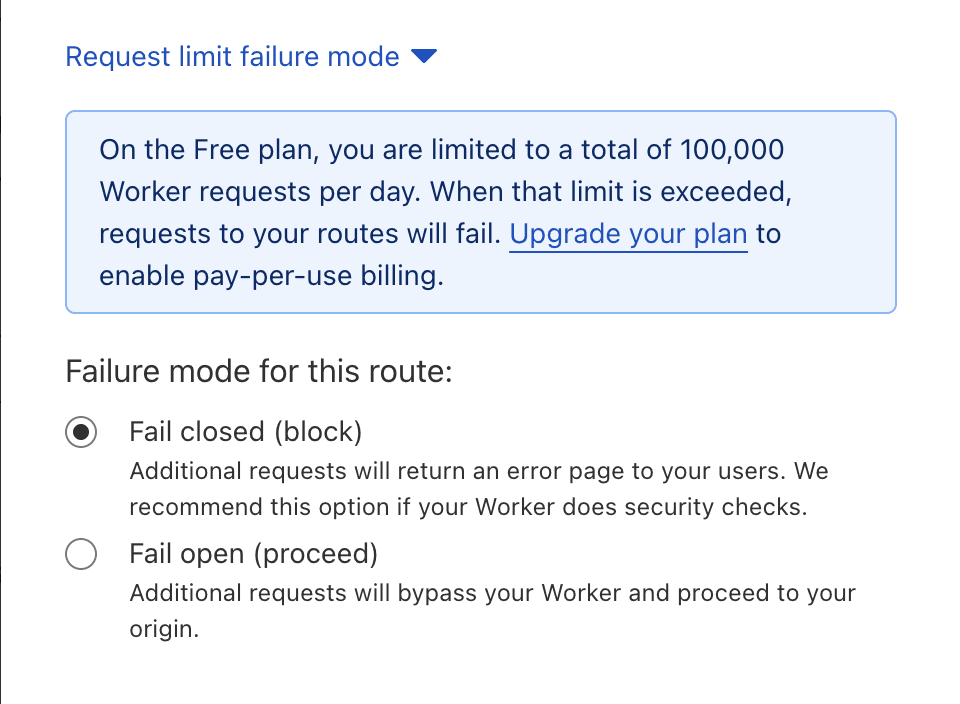
Here we've two options for when we go over quota on the free plan - either a hard block/error page, or the request gets passed through to whatever app we have running on our example.com domain for it to handle.
Speedier, Serverless API Improvements
Cloudflare Workers provide an elegant solution to common API challenges like caching, rate limits, and CORS issues, all without the need for additional servers. By deploying a caching proxy and enabling cross-origin access, you can deliver faster, more reliable APIs that integrate seamlessly with your frontend applications. These improvements can simplify your architecture while reducing load on your backend. A generous free tier makes experimenting easy, so why not clone the repo and try it out for yourself?
PHP UK Conference, London 2026
In February 2026, I'll be speaking at the PHP UK Conference in London. I'll be telling the story behind EverythingIsShowbiz.com, a site that went from a vibe-coded side project, to a useful experiment in integration of AI into PHP workflows.
Get your ticket now and I'll see you there!
